How to Fix Google Fonts Slowing Down Your Webflow Site

At Lightning UX, we put a lot of effort into ensuring every site we build is as performant as possible.
One area that is often the root cause of performance issues for clients is often the fonts they use, and more importantly where those fonts come from.
The typical and easiest workflow in Webflow is to add new fonts from Google Fonts. However, this can cause performance issues even if you just select one font.
This is because every time your page is loaded, your site will need to make an API call to Google Fonts (for every font you use) to load their scripts, which can take a while (this can vary from 100s of milliseconds per call to over a second per call). This even happens if you randomly select a non-system font in the Designer, as the site will automatically call Google Fonts every time any page of the site is loaded. We recently solved this problem for a client who had a huge number of fonts on their site (with a delay of around 2.4s per page load) and found that even though they hadn't explicitly imported a specific Google Font, because they'd styled an element in the Designer with a font, it was being imported from Google Fonts.
There are ways to solve this, though.
Find which fonts you're calling Google Fonts for
Run a Google PageSpeed audit of your site, and if there are any Google Fonts in use you'll likely see a warning saying 'Ensure text remains visible during webfont load'. This is because text has a 'flashing' effect when it's loaded initially with the page, and then replaced with the Google Font.
.png)
As you hover over each font in the list, it will tell you the name of the font in the URL that pops up.
How to make Google Fonts load faster
If you're working on a Webflow site that's already got a fair bit of styling applied with many fonts, you'll need to follow these two steps:
Replace Google Fonts imports with the actual font files
Firstly, remove your Google Fonts imports in the Site Settings. We will be replacing them with the actual font files, which you can download from Google Fonts itself.
Once you've removed the imports, head to Google Fonts, find the fonts you were using and download them.
Often in the downloaded folders, there will be a static folder which is home to the individual font weights and styles. Upload any of the font styles and weights you already use in your design to the Custom Fonts section of Webflow Site Settings. Important: if you already use a font, you should upload all the styles of that font you use, otherwise your site will have to automatically call Google Fonts to get the missing styles, which will mean there's no performance boost. Additionally, you should avoid adding any font styles or weights you're not going to need, as it will be wasted bandwidth for the end user and slow down the site unnecessarily.
After you've published your site with the changes applied, you should see some improvements to speed already.
If there are still some Google Fonts scripts being called, you'll need to move onto the next step.
Identify remaining Google Fonts and remove them from your Webflow site
In some cases, you will already be using a variety of fonts and styles you might not even be aware of, as the fonts were never imported. For example, if someone created a new landing page and decided to use Inter from the Designer's font dropdown.
Finding where these fonts are used can be a headache if you don't know where to look. But here's the quickest way to find them:
- Open the Webflow Designer
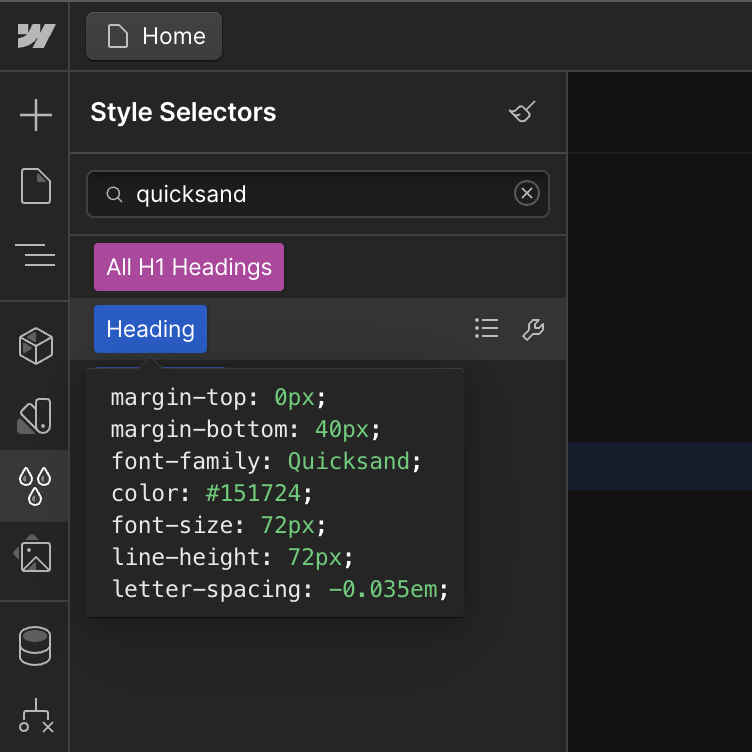
- Open the Style Selectors panel on the left
- Search for the font name that's still being listed as coming from Google Fonts (e.g. Inter)

Webflow will then show you the classes which include that text (e.g. 'inter'), just be mindful that this is a simple search and sometimes it may show you classes for which contain the string 'inter' but not that specific font (e.g. 'interoperability' would be shown in results, as it has 'inter' in the value). You can hover over the classes to see the underlying CSS code, which should clarify whether the font is used in there or not.

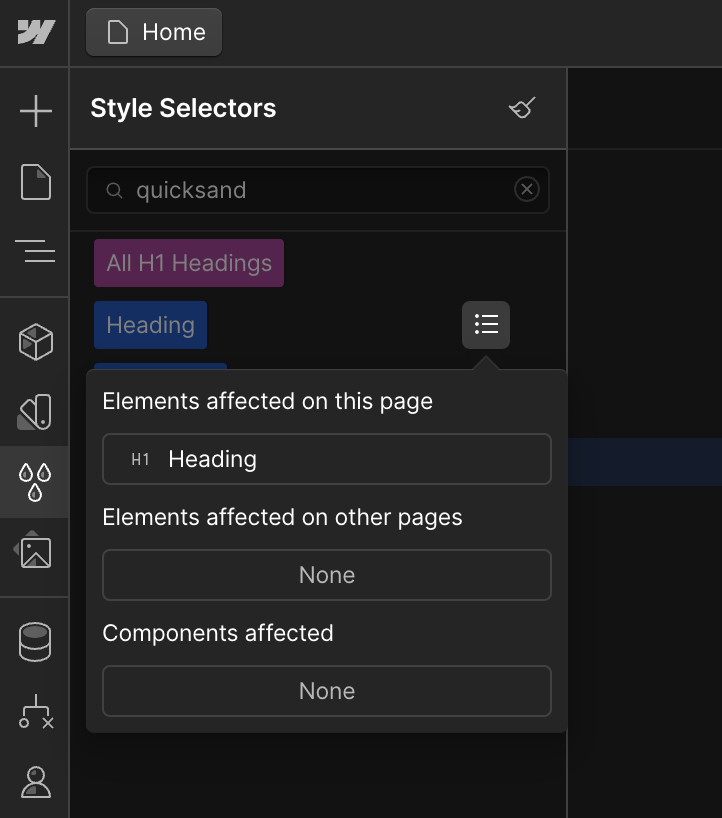
Once you know which classes are impacted, you can work through them one-by-one by clicking the Menu button to the right of the class and clicking on either the elements which use the class on the current page or other pages. From there, you just have to set the font on those specific elements to a custom font you imported.
After you've worked your way through the entire list of classes, you can republish the site. Your site should not be making any more API calls to Google Fonts, which should give you a pretty decent performance boost.


